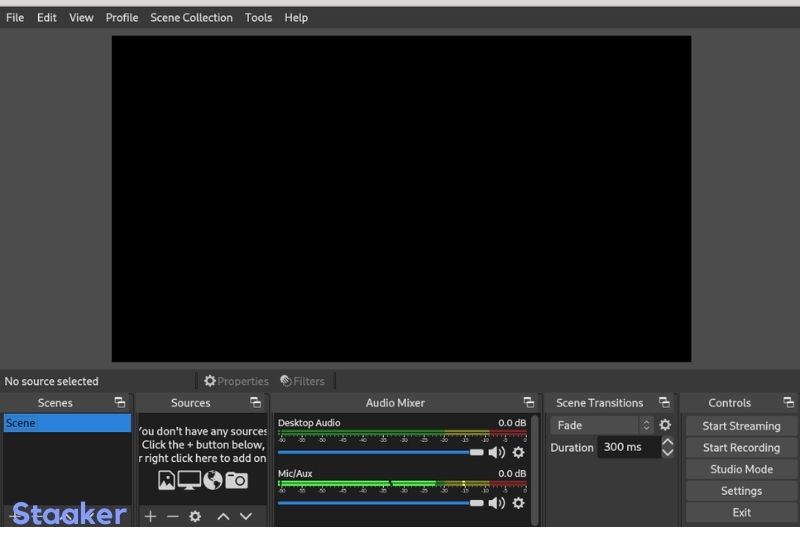
OBS is a popular free video broadcasting software. It allows users to create, record, and stream live video content. OBS can be used to capture footage of your computer screen or game console for streaming on the internet.
If you want to use OBS to create professional-looking videos, you’ll need to use the OBS virtual camera. This guide will show you how to use OBS virtual camera to get the most out of your video recordings.
How To Install The OBS Studio Virtual Camera
The good news is that no setup is necessary. Assuming you have the latest version of OBS Studio, Virtual Camera is now included as standard.
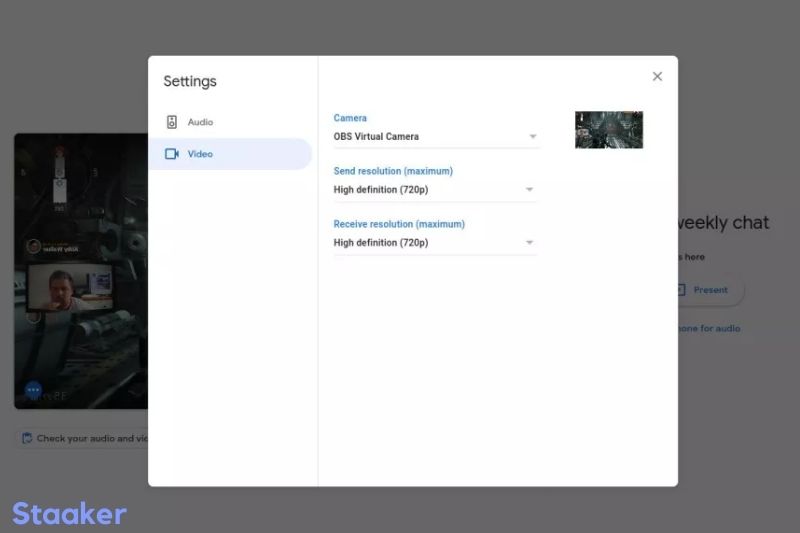
Click the Start Virtual Camera button in the Controls dock on the main screen of OBS Studio to transmit your scenes out to the rest of your system as a webcam.
Then, select the OBS Virtual Camera option instead of selecting your hardware webcam in any app you want to use a webcam with. Because OBS Studio has exclusive access to your hardware webcam, you won’t be able to choose it by accident. Thus you’ll only get a blank screen.
How To Make Your Webcam Look Better In OBS Studio
While utilizing OBS Studio as a webcam is simple, there’s little use until you use the software to its full potential. You don’t need to be a production wizard to make things look a little friendlier on the eye.
The first step is to connect your webcam.
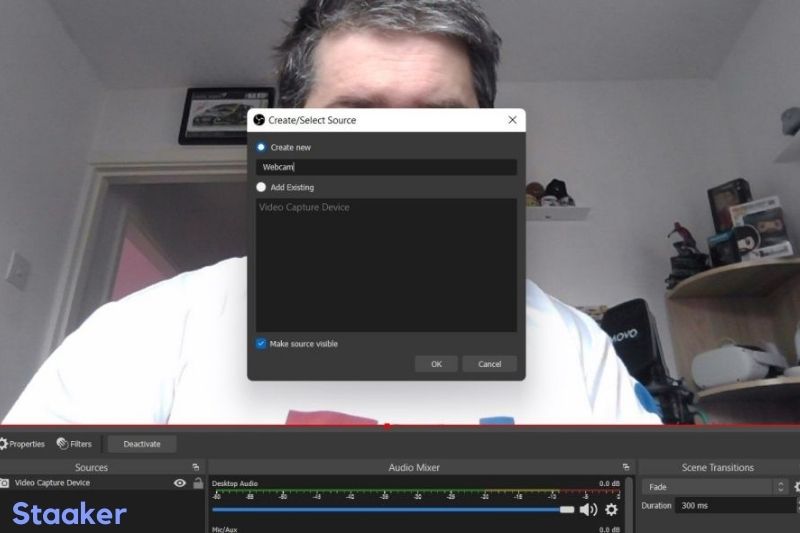
- Click the + icon in the sources dock.
- Choose the Video Capture Device option.
- Choose the Create New option and give it a memorable name.
- In the Device drop-down box, select your webcam.
You may now either click OK or continue to fiddle with the options. If you first click OK, you may return to this menu by right-clicking on your webcam in the sources dock and selecting Properties.
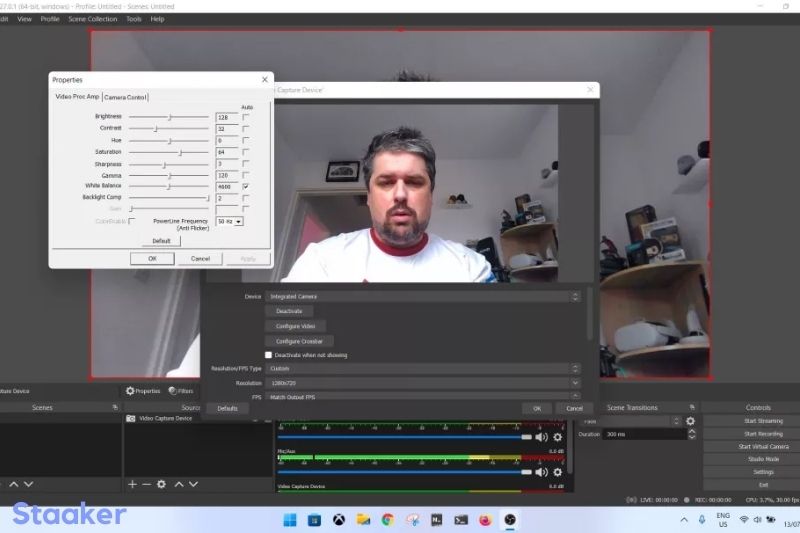
You may adjust many things, but these are the most crucial ones to pay attention to. On Windows, select Custom under Resolution/FPS type, then alter the following settings:
- Resolution – If you want the most pleasing image, make sure you utilize 1080p resolution if your webcam allows it.
- Frame rate – Your webcam will determine the frame rate. Many games only support 30 frames per second at 1080p, requiring a reduction to 720p to achieve 60 frames per second. Try both and see which you like. However, if your webcam supports 1080p 60 FPS, choose that option.
For most uses, you can keep the rest of the initial settings at their default settings. It’s time to start fiddling with the camera controls. On Windows, click the Configure Video button first. However, on Linux, the controls are in the same window. Adjust the following settings in this order:
- Exposure – By default, your webcam will likely overexpose the image, blowing it out. By taking physical control of the slider, you may make it appear more natural. This can be combined with Gain to achieve the optimal balance.
- Zoom and Pan — Not all webcams provide this feature, and it isn’t a genuine zoom. If these options are enabled for you, you can use them to crop out undesired space and make yourself appear larger and more centered in the picture.
- Set the focus manually if your webcam is always hunting for it. Again, it’s on a slider, but adjusting the focus yourself will give you a crisper, more steady image unless you’re moving around.
- Brightness, Contrast, Saturation, and White Balance all have their options, but if you alter one, you’ll probably need to change the others. You can adjust the appearance of your image using any of the four settings, depending on your webcam and ambient lighting. However, you may alter them all manually, and you’ll always get a better result than relying on the default settings.
Your webcam should be looking much better by now. Finally, make sure it fills the OBS Studio window (unless you’re planning to get highly creative) by dragging the corners to resize it.
Because Virtual Camera sends out precisely what you see in OBS Studio, if your webcam is the size of a postage stamp, that’s how it’ll appear on your Zoom call.
However, you can do one more thing using OBS Studio to make your webcam stand out.
How To Use OBS Studio To Add Filters To Your Webcam
You can tweak all of the settings above to alter the video coming in from your camera, but there’s much more you can do. You can use filters in OBS Studio, in the same manner you would in post-production editing of a photo or video.
There are several filters available, but two, in particular, will improve the appearance of your webcam: Color Correction and LUT.
- Right-click on your webcam in the sources dock and select Filters to apply a filter. Select one of the two options above to add a new item to the Effects Filters section. What you can do with them is:
- Color Correction – Some of the same options as the webcam, plus extra options like Gamma and the opportunity to fine-tune your color settings. You probably don’t need to drastically modify any of these settings, but you’ll be surprised how much better you can get.
- LUT – This is the same as adding a LUT to a photo or video, and you can find lots of free ones online. The OBS Forums have a complete bundle available, which is excellent to start. Browse for the file you want, then change the power with the slider. These can significantly influence, but they’re also fun to play about.
Additionally, if your webcam produces exceptionally soft images, you can apply a sharpening filter; however, it is pretty powerful, so don’t overdo it.
All of these are simple to implement and are also absolutely free. This is also just scratching the surface of what OBS Studio can achieve. If you want to get more advanced, you may use a Virtual Camera to create an entire presentation with different scenes and send it all over your video conferencing program.
Maybe you need to know: How To Allow Camera Access On Snapchat
FAQs
Why don’t my OBS output settings always match the resolution and framerate?
OBS-Camera will default to 1080p 30fps if you launch an OBS-Camera device in a 3rd party application before starting the output in OBS. If you start OBS first, it will use the Output resolution and framerate that you specify under Settings -> Video in OBS Studio’s preferences.
Is this plugin compatible with other platforms?
You can use the Video4Linux sink plugin for OBS Studio on Linux. That link contains instructions on how to configure it. Although no timetable has been set, a similar plugin for macOS is being developed.
Is there a virtual background in OBS?
An OBS plugin provides a virtual background capability similar to Zoom/Meet. Green, any color, and rainbow/full-color T-shirts are all acceptable!
How do I make my camera have a virtual background?
- Step 1: Get the virtual background application. First, get the third-party virtual background application and install it.
- Step 2: Go into the Lifesize options.
- Step 3: Alter the camera input.
- Step 4: Use a third-party app to control the background.
Video
Conclusion
In this article, Staaker.com have covered the basics of using the OBS virtual camera and explained how it can be used to create professional-looking videos.
Please feel free to share any questions or comments in the comments section below if you have any questions or comments. Thanks for reading!

