With the ever-growing popularity of digital cameras, it’s easy to forget how to load a film camera. But for those who still enjoy the vintage look and feel of film photography, loading a film camera is a must.
It can seem daunting if you’ve never loaded a film camera before. But don’t worry! This guide will show you how to load a film camera in just a few easy steps. With a bit of practice, you’ll be a pro.
How to Load Film into a Camera: Basic Steps
Loading film into a camera can be challenging at first, but you’ll get it quickly. If you know how to put film in a camera, you’ll be able to shoot some incredible images.
Step 1: Take a look at your camera
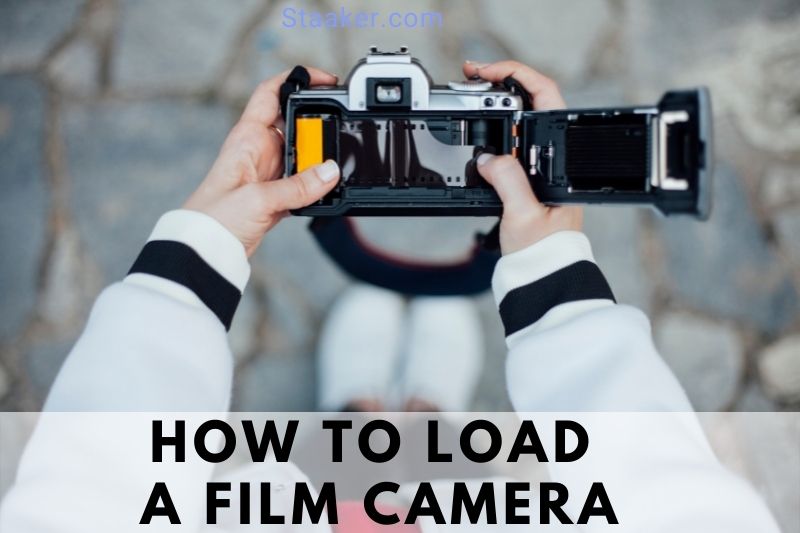
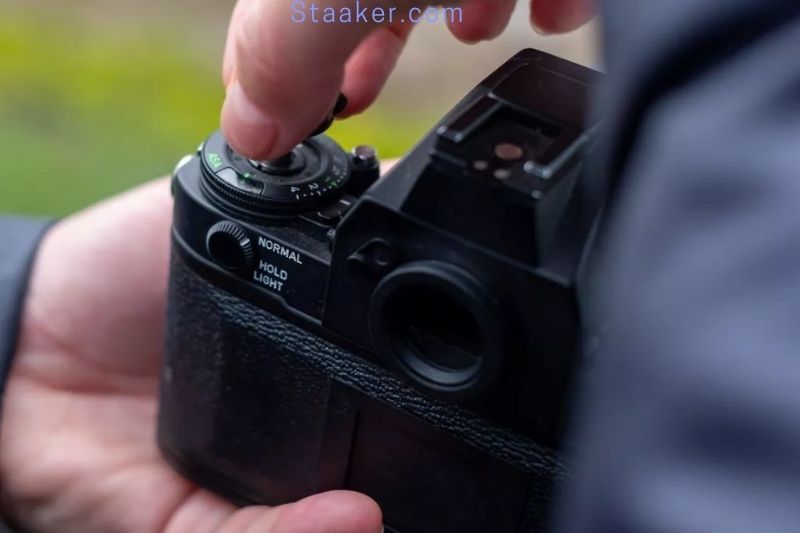
The first step is to open the camera’s rear. The rewind knob on most cameras will open the camera back up when pressed. The back of the camera should spring open when you lift the rewind knob till it clicks.
Instead, some cameras have an open switch that opens the back of the camera. Refer to your camera’s manual or search it up online if you’re unsure how to reach the film chamber.
Step 2: Get Your Film Ready
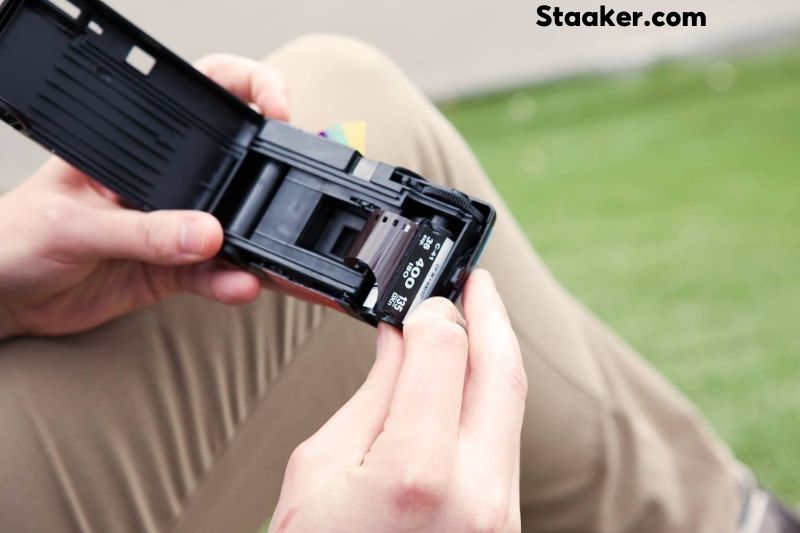
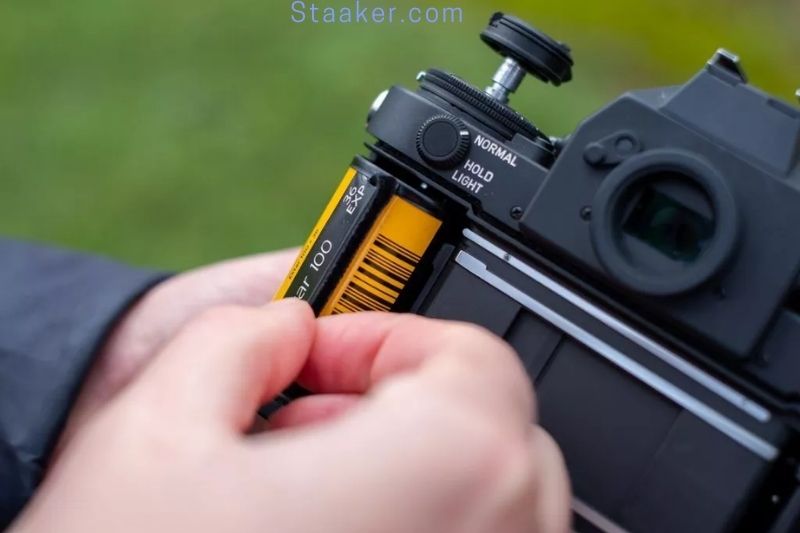
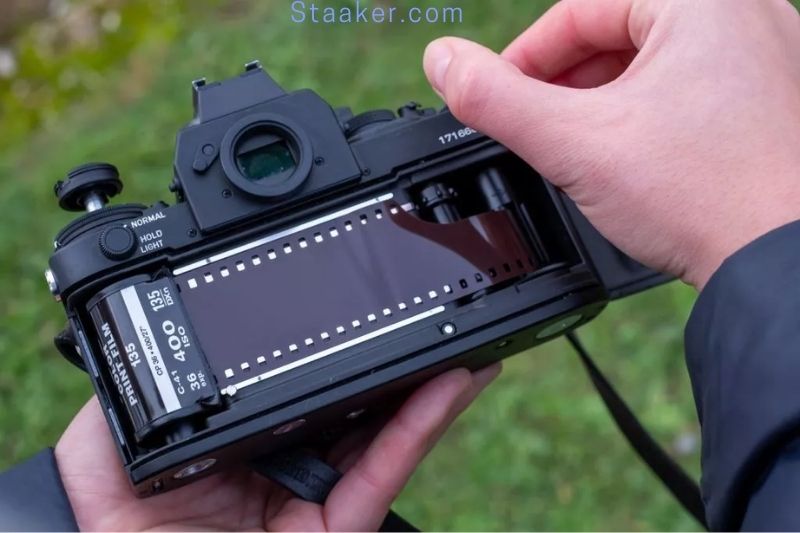
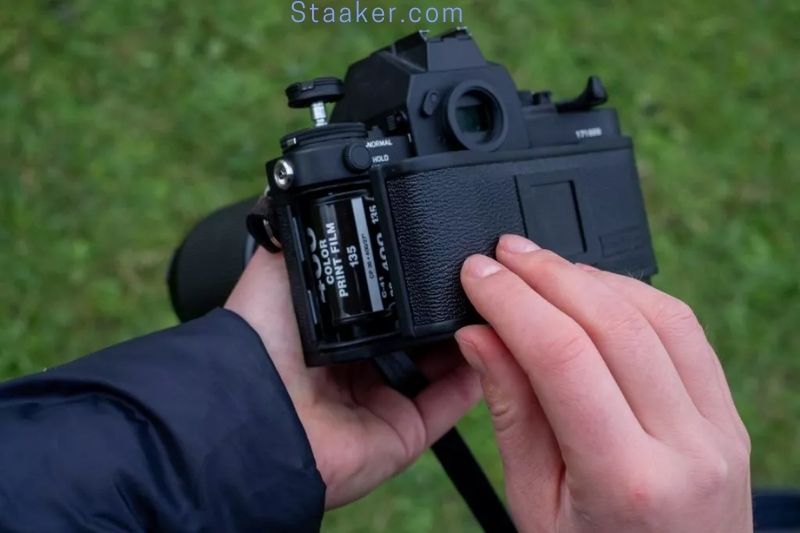
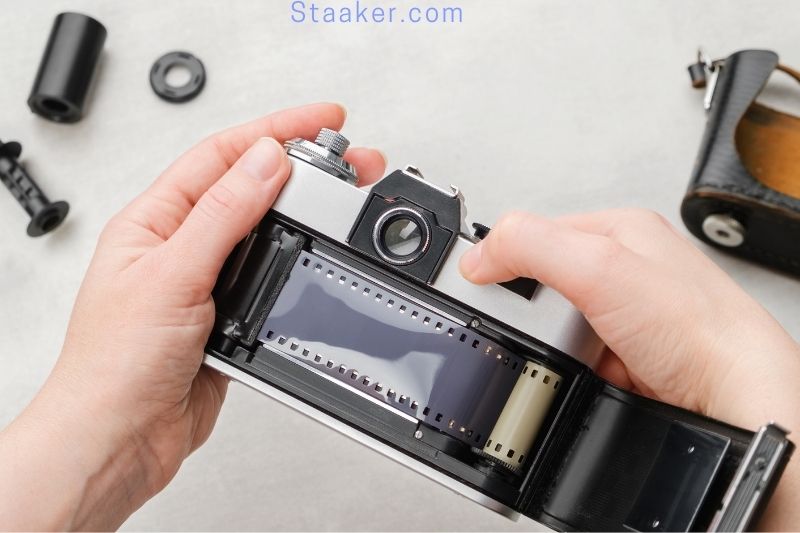
Remove your film from the little container. The leader is around an inch of it that you’ll see. Place it on top of the film chamber on the camera’s left side, with the film leader pointing to the right.
Pull up the rewind knob or press the film into the chamber to load it once appropriately positioned. Please do not proceed to the following step unless you are confident that everything is in its proper location. You should be able to hear it snap into place when you enter the chamber.
Step 3: Install the Film Director
When loading film into your camera, this step is crucial. The leader must be correctly fixed for the camera to wrap it through each time you take a photo.
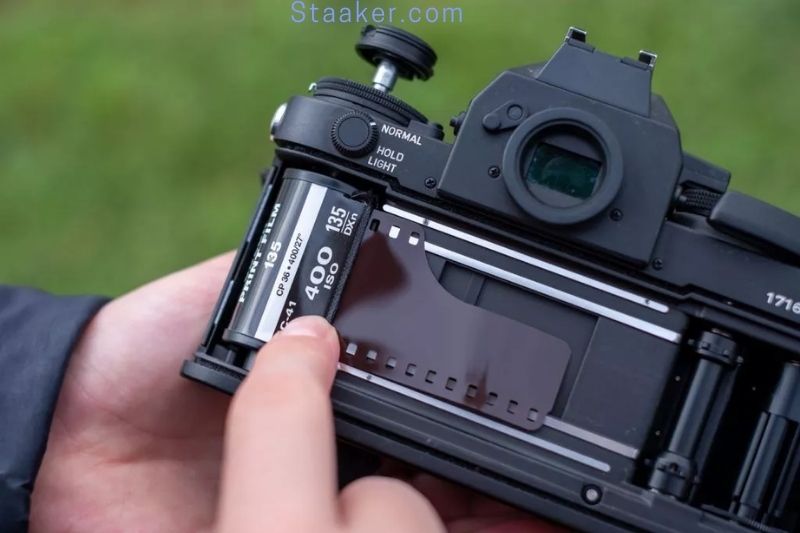
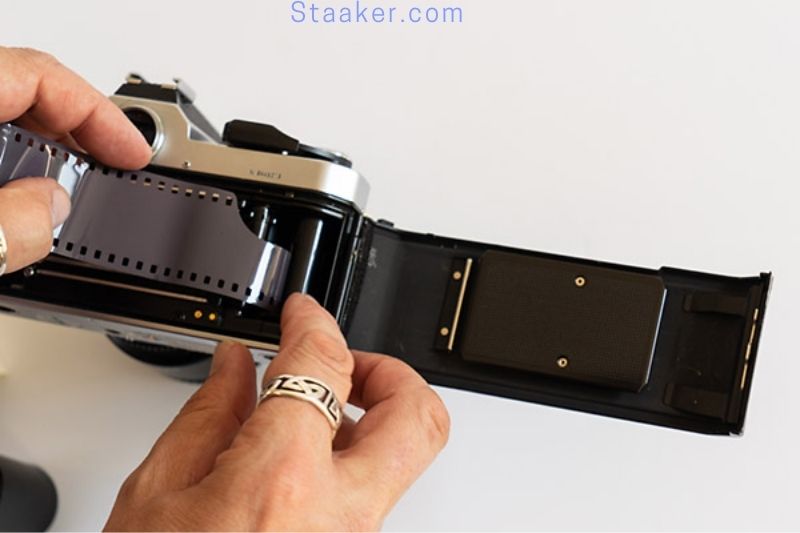
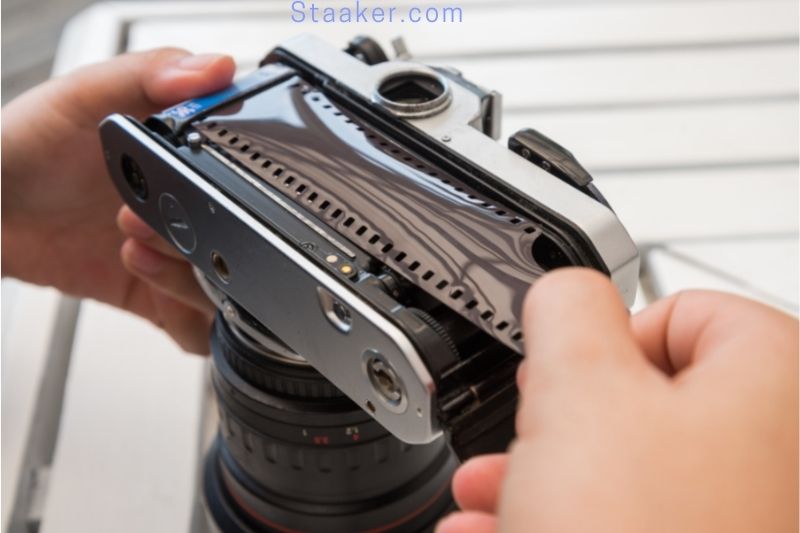
Pull the film leader across the camera to the right-hand slot known as the take-up spool. You can achieve this by gently holding the 35mm film at the top and bottom of the frame, as you don’t want dirty fingerprints ruining your images.
Push the thin end of the leader into the take-up spool while keeping it steady with your fingertips. You must ensure that the leader is inserted far enough into the spindle to be taken up.
Step 4: Play the Film again
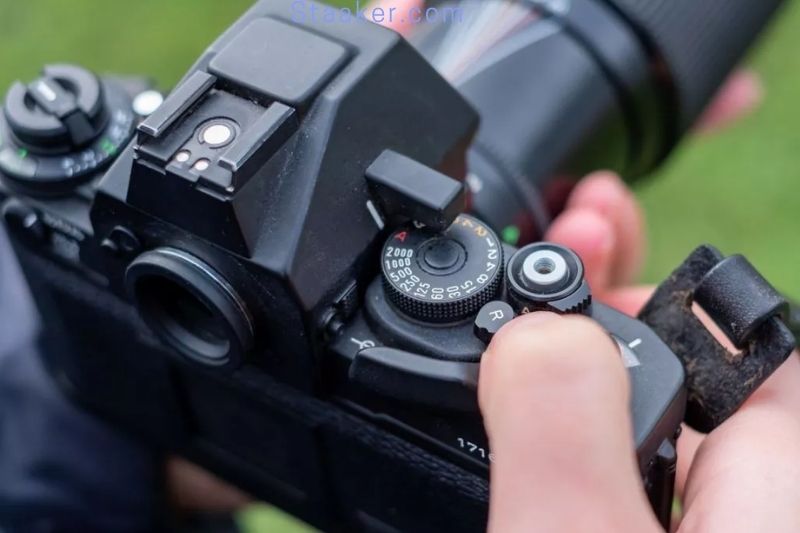
The following phase necessitates some coordination. With your left hand, carefully hold the leader in place while lining up the sprockets on the spindle. Next, locate the film advance lever on the top right of your camera with your right thumb. It’s also possible that you’ll need to keep the shutter release button on or near the lever.
Advance it just enough for the spindle to pick it up and begin winding it up. Repeat using the film advance lever until you have a reasonable length of film wound around the spindle and it is securely in place.
Step 5: Put the camera away and start taking pictures!
The final step is to close the camera, but only after double-checking that it is loaded correctly. The back compartment should be firmly closed with a click. To prevent utilizing the exposed film at the beginning of the roll, wind on it. You can do this by pressing the shutter button and spinning for a few seconds. When the counter reaches zero, come to a halt.
That’s all there is to film loading! In your initial effort, take each step calmly and don’t rush. You don’t want a minor blunder to derail your project.
So, you’re all set to begin shooting! Film photography is a terrific experience, so try new things, be creative, and have fun!
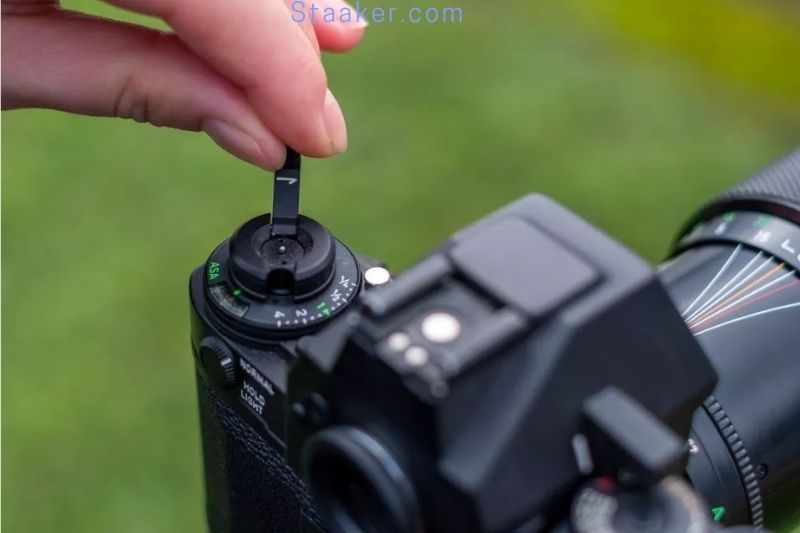
Keep in mind that the ASA should be adjusted to match the current one. If you were previously shooting with ASA100 film and have now switched to ASA400, you will need to adjust your settings before you begin shooting.
In case you want to have a great photo, maybe you can learn something about this article: how to make a quality camera better?.
How to Load 35mm film in a Camera
Step 1: On the left side of the camera, locate the Rewind Knob and pull up until the back of the camera opens.
Step 2:For your film to load into the Take-Up Spool cut a Leader. The leader must be roughly 22mm long to fit into the spool.
Step 3: Insert it into the camera’s left side. After inserting the film into the pocket, lower the Rewind Knob to establish a snug fit.
Step 4: Transfer the Film’s leader to the Take-Up Spool. Insert the film leader’s thin end into the slot. Hold the spool steady and press the film deep within until it is entirely inside the spool or comes out the other side.
Step 5: Double-check that the teeth are positioned correctly on both sides of the film. To secure it to the camera, use the rewind knob to take in any slack. Then close the camera’s rear and wound it using the film advance.
Step 6: Take three photos. The rewind knob will revolve every time you crank the film advance lever if the film has been correctly loaded. If not, tighten it to the camera again to ensure the slack has been removed. Take at least two photos to wipe away the exposed film and start over with the new one. You’re ready to take images once you see the number 1 in the window.
Step 7:The ISO Film Speed should now be set. To change the film speed, gradually raise the ISO speed ring and turn it to the ISO speed indicated in the window. (The numbers on the ring’s INSIDE window should spin due to this.)
Step 8: To adjust the shutter speed, turn the shutter speed ring to the desired setting. On this camera, the shutter determines the length of exposure; the higher the number, the shorter the exposure time. (The numbers on the OUTSIDE of the ring should spin as a result of this)
Step 9: Turn the aperture ring to the desired aperture to set the aperture. The narrower the aperture opening is, the less light is passed to the film, and the larger the aperture number is. (the nearest dial to the camera)
Step 10: A built-in meter is included with this camera. The meter is activated when you press the shutter release button down about a third. Rotate the shutter speed dial or the aperture ring until just the green o LED is lighted while the meter is turned on. The red + LED light indicates that your subject is overly bright.
Change the shutter speed or aperture to compensate. The red – LED light indicates that your subject is excessively dark. Reduce the shutter speed or the aperture. For the most significant outcome, the goal is to achieve the green o LED light.
Step 11: Push down on the self-timer lever until it stops to set a timer. When you’re ready to shoot the picture, fully depress the shutter release button to start the timer. In ten seconds, the snapshot will be taken. (The length of the timer may vary depending on the camera’s brand and type.)
Step 12: You must rewind the roll of film into the canister once it is finished. Press the film release button on the bottom of the camera to rewind your film. Fold out it, rewind the crank and turn it in the arrow’s direction until no more tension is felt on the knob.
Step 13: Pull up on the film rewind knob until the camera’s back cover opens. It should now be wrapped back into the film canister and ready for development.
Video
Film Photography Tips
Select the Proper Film
To achieve the most satisfactory results, you should choose the proper film for the lighting conditions. If shooting in low light, use a faster film speed, such as 800 ISO. However, if there is plenty of natural light, a lower ISO film speed can be used. For all-day shooting, 400 ISO is a decent choice.
Choose the Correct Options
Before you begin shooting, double-check that your camera is set up correctly. Consider the ISO, aperture, and shutter speed best for the photographs you intend to capture. It’s worth spending a few minutes at the start to get your settings just right; you’ll notice a significant improvement in your photographs once you do!
Is it possible to load film in the light?
Only the leader should be exposed so that you may load film in the light. The film cradle includes felt around the edges to prevent too much light from coming in a while switching films. If at all possible, avoid loading your film in direct sunlight. Turn away from the sun or use your hands to shield your camera from the light.
If you frequent travel and want to bring a camera, see this guide: can you bring the camera on the plane?
FAQs
How can I tell if my camera has a film in it?
Taking a picture and then advancing the film is the best technique to see if there is still film in your camera. If you have a more modern camera with an automatic film winder, you may need to replace the battery before closing the shutter.
If everything is mechanical, the simplest way to see if there is a roll of film in the camera is to look at the rewind knob on the top left of the camera. There will be a film in the camera if the rewind knob turns as you advance the film lever. If it remains motionless, you know there is no film in the camera.
How many photos will I lose if I open the camera by accident while there is film inside?
Everyone has experienced this at some point in their lives. I can tell you that I’ve destroyed a few photographs by inadvertently opening the camera at the wrong time. Depending on how far you opened the rear and how many pictures you captured on that roll, you may only lose 4 to 8 shots if you quickly open and close the camera.
The anti-halation coatings on the rear of the film will, for the most part, protect the rolls from light. The film’s edges will be scorched several layers deep. However, unless you keep the camera open for 5-10 seconds, the majority of the images will be safe. Every shot that wasn’t in the canister is likely ruined at that point.
What is the best way to see if the camera is working?
When you first pick up a camera, the best way to see if it works is to open the camera back, cock the shutter, and release it. The camera is operating if it appears accurate at a few different shutter speeds.
If it hasn’t been serviced in a while, the best course is to get it CLA’d by a professional. The procedure will be costly, but it is well worth it to ensure that your camera does not fail you when you need it most.
Learn more about the kind of tests you can perform when purchasing a film camera.
When the roll is ended, how do I rewind the film?
First, make sure you don’t over-tighten the film to acquire that last frame. It’s not worth destroying an entire roll of film with stretch marks only to get an extra frame, no matter how close to the end you are.
When the film is finished, the rewind button is usually located on the bottom of the camera, next to the shutter. Release the tension on the take-up spool by pressing this button, then rewind the film with the rewind knob on the top right.
What is the best way for me to figure out what shutter speed to use?
It can be challenging to choose the proper settings on a camera without a light meter right away. The most basic method that does not necessitate any equipment
The Sunny 16 rule can be used as an additional tool.
Set the aperture to 16 on a bright, sunny day, and then match your shutter speed to the ISO of the film material. If you’re shooting at ISO 400, a shutter speed of 1/500 to 1/250 will appropriately expose the film.
If there are any clouds in the sky, reduce the aperture to f/11, and if it’s entirely overcast or early evening, reduce it to f/8. Later in the evening, f/4 is excellent.
It has a wide exposure range and can handle a little underexposure and a lot of overexposure. As a result, utilizing this method will usually come out well exposed. However, it’s always better to err on caution and overexpose.
What applications or light meters would you suggest?
Lightmeter Tools – trial on Android – is the app I’ve found to be the most dependable. The software isn’t as stable as other the more often updated apps. Still, it’s the only one I’ve discovered with a spot meter that considers Neutral Density filter usage.
Reveni Labs is one of the newest firms to introduce innovative and affordable light meters to the market if you want a dedicated, trustworthy Lightmeter to add to your camera. The designs are both inventive and functional.
How long do I have to wait for my film to be developed?
The sooner, the better, for the following reasons:
- When a film is exposed to light, excited electrons go to a new area on the grain called a hole, where the latent picture is recorded. The grain will become developable if enough electrons reach the holes on the grain.
- Those electrons can move if the latent image is left long. As a result, certain formerly developable grains may become undevelopable, and vice versa.
- This effect is most harmful in the shadows, where fewer grains are to grow.
- However, no one knows how strong this effect is. Modern films are built for latent image stability, and they can likely last 6 months or longer without losing any shadow detail.
- That’s a roundabout way of saying that the sooner, the better, but it won’t be the end of the world if you have to wait a while to develop a large batch of film.
What is the best way to store film?
If you plan to retain color film for more than six months, put it in the fridge or freezer. In contrast, B&W film can be stored at ambient temperature.
This is because the film’s undeveloped color layers are the first to degrade.
Keep it away from typical household cleaning and maintenance items such as glass cleaners, mothballs, and furniture polishes, as these can generate vapors that break down the film.
What is the best way to keep developed negatives, and how long will they last?
Acid-free archival storage sleeves should be used to store developed negatives. A micro-perforated box with some airflow is the best place to store the negatives. Containers that retain air, such as tin cans or fire-resistant safes, can speed up the degradation of the film by trapping any acids that escape when the breakdown process begins.
At 20 degrees Celsius and 50% relative humidity, acetate film typically last 40 years before breaking down. The film will break down faster if the humidity is high.
When the film begins to degrade, it emits a vinegar-like odor. If you detect this odor, remove the negatives from the collection that are emitting it right away since it may hasten the degradation of other negatives nearby.
For additional information on how long films last and which ones survive the longest, see this detailed page based on research by the field’s finest scientists.
What is the distinction between a rangefinder and an SLR camera?
A rangefinder, for example, has two screens on the front: a focusing screen and a viewfinder. Whereas an SLR has only one viewfinder and a mirror that reflects the image upwards, a DSLR has two viewfinders.
Rangefinders are stylish, simple, light, quiet, small, and enjoyable. SLRs are all of these things, but they require less maintenance and are a little noisier overall because of the mirror. SLRs were the most popular cameras on the market because they were the most reliable when it came to focusing and because they showed the image exactly as it would look on film.
SLRs will be the most affordable film camera on the market. Good, dependable rangefinders are frequently expensive.
Conclusion
Ultimately, film cameras are the best option for those who want to experience photography’s unique beauty and charm on film. Loading a film camera will become a breeze with a bit of practice. So don’t wait any longer – start shooting with film today!

