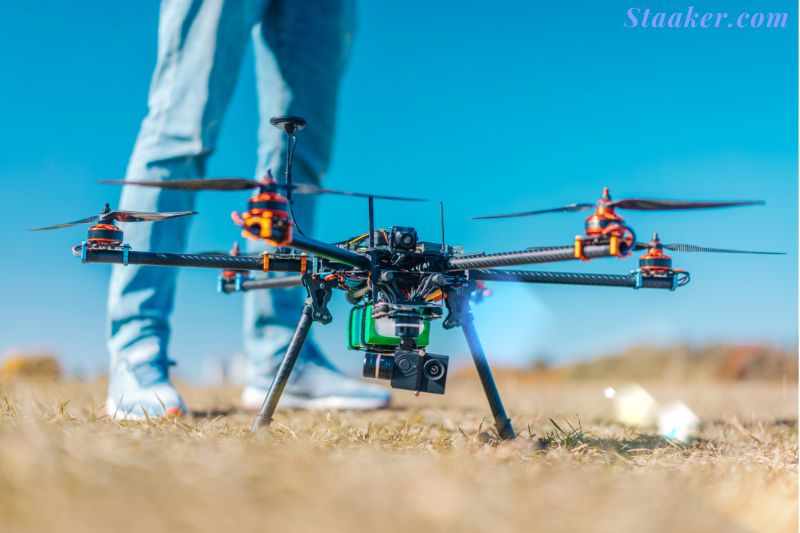
In recent years, drones have become increasingly popular. A drone is a flying robot that can be controlled remotely and can be used for various purposes, such as taking photos or videos, carrying goods, or even performing acrobatic tricks.
If you’re interested in learning how to build a drone, Staaker.com will provide a few things you need to know.
Video
DIY Drones vs DJI Drones
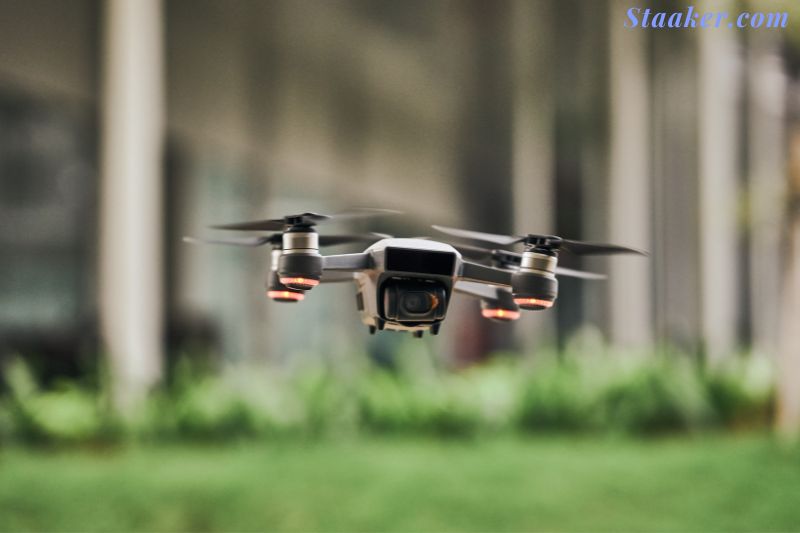
Good luck if you want to compete with DJI to get a stabilized camera drone. With their recent releases like the DJI Mini 2, you can get a great camera drone under 250 grams that shoots 4 stabilized footage. You won’t be able to match that, and even if you did, the footage would be worse, and the drone would be waaay bulkier.
However, there is a type of drone in which we can compete with DJI and win.
The types of drones it would make sense for you to build at home would be:
- A mini drone ( just for experiencing flight, with no camera, or for a school project)
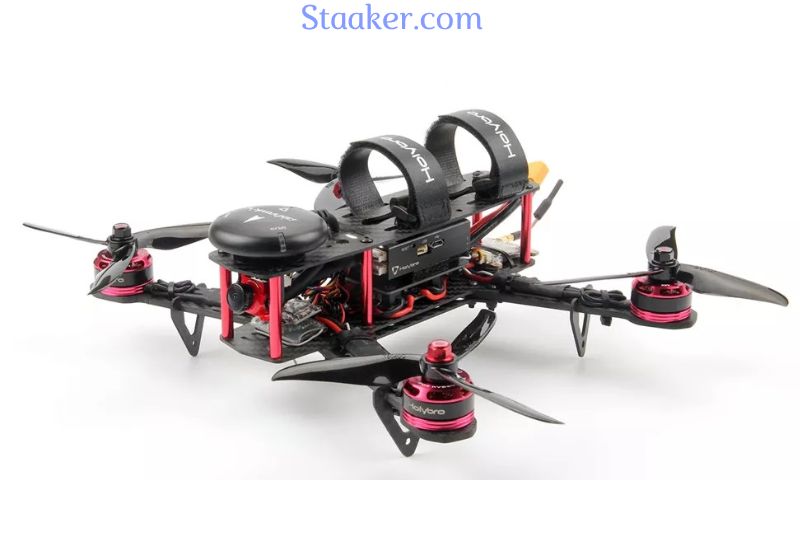
- A standard quadcopter (maybe with a camera)
- An FPV quadcopter (the most dangerous yet most extraordinary of them all)
Of course, the dangerous but awesome one.
Here’s why I haven’t made a complete tutorial for the others: There are too many great cheap camera quadcopters out there, and making one yourself would imply buying an expensive 3-axis gimbal, camera, and a solid frame to get some average-looking footage, for more money than it would cost you to buy a DJi Mini 2 for example.
However, if you build an FPV drone, you can experience First Person View flight through a pair of goggles, fly it slow or very fast, and most importantly, you’ll be able to make a top-of-the-line drone at quite a low price.
How Do You Learn To Fly FPV? Isn’t It Difficult?
If you’re asking yourself this question, you certainly don’t know how to do it. However, there are a few ways to get good fast at it.
Flying FPV means being accessible, not having GPS or stabilization like in typical camera drones, but being able to fly acrobatically. At the same time, you watch everything from your goggles and feel like a bird in the sky.
There are 2 ways to learn how to fly such a drone, and I recommend you try them both:
- Getting an indoors FPV quadcopter (with prop guards)
- Flying in a simulator
If you want an indoor FPV quad to learn how to fly on, I suggest the Tinyhawk 2, as it comes with prop guards and a complete package, including a good pair of FPV goggles (which you can use with other drones as well) and a controller. It’s well priced for the package but still more expensive than a simulator.
So I recommend you also check what fpv simulators are available to buy and try one out (with a real-life drone controller).
What Type Of Drone Should I Build?
You may already have started searching for parts only to discover that they can be found in all shapes and sizes. The best way to categorize them is actually by prop size as follows:
Typically very small and suitable for indoor use. They are great for practicing at home or in bad weather! These little rockets are becoming increasingly popular; some can hit up to 100mph!
3-4″ Micro Class Build
The smallest full-size drone you should be flying outdoors. These fly similarly to their bigger brothers and are the perfect option for tight spaces.
5″ Mini Class Build
The most common type of Racing/Freestyle Drone. They are often described as the most versatile because they offer a large amount of power yet have incredible maneuverability and can carry an HD camera such as a GoPro without a significant compromise on flight characteristics. Ninety percent of mini quads at this point fit this category.
6″ Mini Class Build
A more long-range and efficient option, great for someone who would rather cruise at speed than race and perform fast tricks such as flips and rolls. This size is often used in a long-range setup to fly over scenic locations.
7+” Class Build
You start to get into the photography/videography side of things at this size. These drones are big enough to carry a camera with a stabilization system. They use other features such as GPS to hold their position and even return home automatically.
These are typically flown in a self-leveling mode as opposed to the acro mode used for the smaller quads and have larger batteries allowing them to go much further.
Hopefully, that gives you an idea of which size you want to build.
When choosing a size, please remember that the smaller you go, the less space you have to work with when you build. On the other hand, a smaller quad is often cheaper, and the lower weight will reduce the chance of damage during a crash.
My recommendation for a first drone would be a 5″ as they are easy to build and have enough power to lift an HD camera. The 5″ Drone also has the most readily available supply of parts meaning that everything is as cheap as possible and easy to get hold of.
Necessary Items To Build Own drone
Frame
The frame is the base for your drone. You can either build it yourself or buy the structure from a retailer.
The frame is also crucial in the dimensions of your drone; how many arms your frame has will dictate how many motors you will need. Quadcopters, drones with four engines, are by far the most popular.
The other dimension of your drone is size; frame sizes list the farthest distance that two motors are from each other.
Motors
Drone motors are separated into two main types: Brushed and brushless. We recommend brushless motors.
While they are more expensive, they also last longer, have fewer breakdowns, and use less battery – meaning more air time.
ESCs or electronic speed control
An essential piece of your drone as it delivers the electricity from the battery to your motors. You will need one for each of the engines on your drone.
Propellers
When buying propellers, you must find ones matching your drone’s frame and motors.
When you build your drone, you must ensure that everything works together.
The power distribution board
This is where your main electrical components connect. The battery is attached to the power distribution board, where the ESCs and motors draw their power.
Connectors
Connectors are needed to weld the motors, ESCs, and power, distribution board.
Flight Controller
The flight controller is the hardware hub of your drone. It’s where you connect things like ESCs, RC Input, GPS, Telemetry, and many other components you can connect to your drone. It is the brain of your drone.
They usually come equipped with a gyroscope and accelerometer, which automatically helps balance your drone.
Flight controllers are controlled by their firmware, which can either be closed source, where you can’t see the code or make modifications or open-source, where you can make your modifications.
If you are considered to connect drones to controllers, don’t hesitate to read our article: How To Connect Drone To Controller?
Batteries
When purchasing the batteries, you must again consider the capacity and the type of battery, so it fits your drone. The most used batteries are the Li-Po batteries.
Battery monitor
A battery monitor is not an essential item. However, it is helpful as it lets you know how much juice you have left.
RC Controller
Used by the drone pilot to control the drone.
RC receiver
Receives the inputs when you or whoever else uses the controller.
Mounting pad
Reduces vibrations and therefore improves flight. It is beneficial when shooting footage.
Gimbal
A gimbal is a support system for your camera. It keeps your camera at the same angle, regardless of motion, and lessens vibrations. It is essential to take your footage from amateurish to professional.
Camera
They are needed for recording footage. The best drone cameras can shoot in 4K quality.
USB key/Micro SD card
If you use a camera, you need somewhere to store your footage.
Next up! Now you have all the parts, let us look at how to build your drone.
9 Easy-to-Follow steps: How To Build A Drone
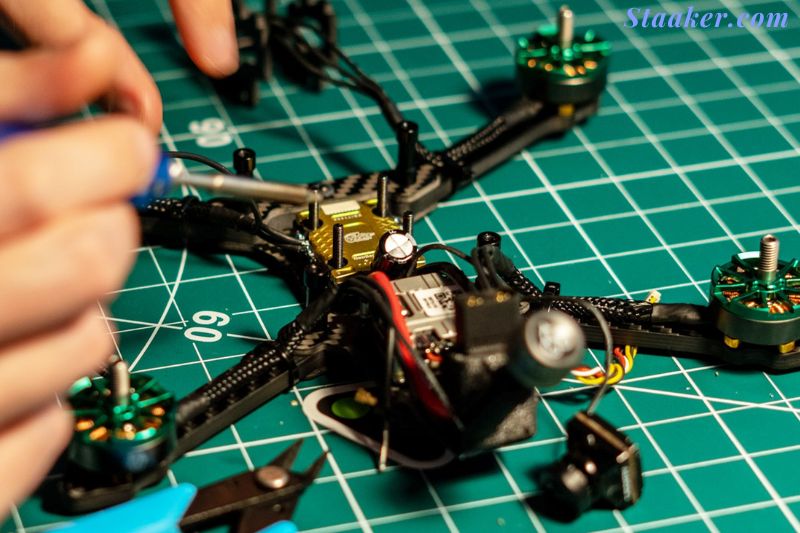
Step 1: Assemble the frame
If you are making your frame, you need to assemble it. Depending on how sturdy you want your drone to be, you can use different materials, such as metal, plastic, or wood.
Your frame needs to be in an X shape, and each propeller will go on each point of the ‘X’.
Step 2: Construct your drone’s motors and propellers
To build your frame, you must make holes for the motors and affix them to the edge.
If you have a premade frame, you may discover it came with mounts for your motors.
Step 3: Mount, your electronic speed controllers
When you’ve attached your motors, you’ll have to connect your ESCs to the bottom of your drone’s frame.
Step 4: Connect the battery connector to PDB
Attach your PDB to the bottom of your drone, and connect the battery connectors.
Step 5: Attach the landing gear
You’ll need to have landing gear on your drone, to absorb the shock from landing on a hard surface.
Make your landing material out of something solid and flexible, as it will help you avoid damaging your drone when setting it down.
Step 6: Choose and add your flight controller
Mount your flight controller on your drone. Ensure that you add a sponge or soft material underneath the controller to reduce vibrations.
Then your drone should be able to stay stable in the air and make sense of shifts and changes in the wind.
Step 7: Connect the drone to a GCS and calibrate sensors.
Make sure to check that everything works well. You can test this by using a GCS and calibrating the different sensors on your drone.
Step 8: Double-check and test out.
Check and double-check everything is working and calibrated. Choose a safe location, slowly throttle up your drone and fly at a low altitude the first time you test out your drone.
Step 9: Prepare for take-off
Now the only thing left is to figure out where you are allowed to fly your drone and make sure that everything is in order before you go out there and fly your brand new drone.
Rent or subscribe to your next drone
You now know how to build a drone and make it flight-ready, but if you’re starting, how about renting or subscribing to your next drone?
You don’t have to worry about significant investment and have precise technical knowledge of soldering and calibration. Just take a chance and try out a drone.
And if your arsenal of gear isn’t fully there, check out the must-have camera equipment here.
How To Build A FPV Drone
What Parts Are Needed To Make An Fpv Drone?
There are many ways to make an FPV drone. However, the components are almost always the same. These are:
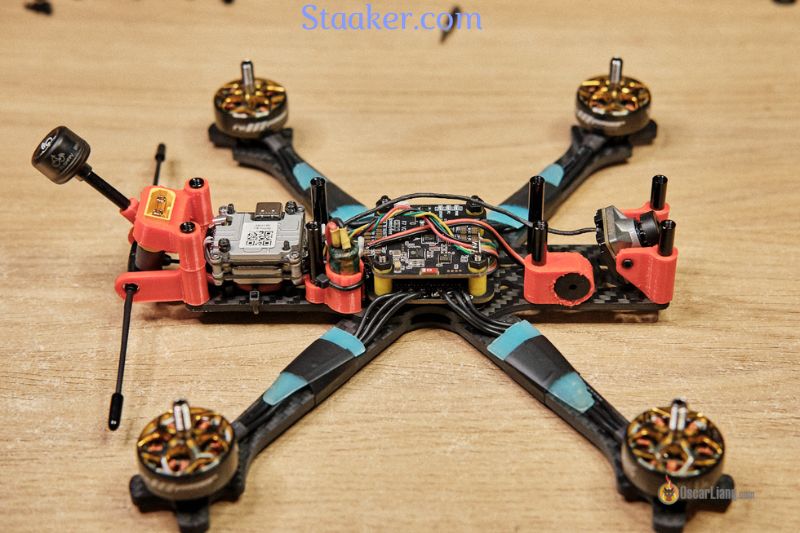
1. Frame – Your main body
2. Motor – This motor gives the FVP drone its ability to fly at high speeds
3. Fight controller – The brain of your drone that sends signals to ESC
4. Electronic Speed Controller (ESC – Produces three-phase AC that drives the motor
5. Camera – Your drone’s eye!
6. The Power Distribution Board (PDB) connects all electronics and takes battery voltage.
7. Vtx (Video Transmitter – Receives signals from the camera and sends them out via the antenna
8. Goggles – The drone’s vision
9. Vtx Antenna: Two antennas improve video range and clarity. One sends the video, and one receives it.
10. Receiver – Control your drone
11. Propellers – The source of movement and control for your drone
12. Batteries – Your drone’s source of electricity
13. Battery charger – Specialized charger for batteries
14. Batterie straps – Attach your batteries securely to your drone
Step Guide On How You Build An FPV Drone
- Step 1: Assemble the frame
You will first need to assemble your FPV drone’s frame. You won’t go wrong, as you will receive an instruction manual.
- Step 2: Mounting your PDB
Mount the PDB first. The PDB will be connected to every other component of your drone. The direction of your PDB will be determined by the position of the battery and the direction of the USB connector.
Next, use your rubber or nylon standoffs to mount the PDB.
- Step 3: Mounting your Motors
Make sure to understand the order of your motors before mounting them onto your frame. This will help you to attach them with screws correctly.
- Step 4: Mounting the ESCs
If you have more than four ESCs, I suggest you attach them to the arms using double-sided tape. Once connected, wrap them in electrical tape.
It’s simple to mount a four-in-one ESC onto your frame if you have it.
- Step 5: Connect the ESC to the motor
This step will require some soldering skills, so be prepared! Remember that each motor will require soldering to connect to the ESCs.
Four separate ESCs. Connect the wires of each motor to one end and the power wires to the other.
You can connect 3 wires from each motor to each end of the 4-in-1 ESC.
- Reduce the length of the motor wires.
- Tin the ESC pads and the ends of your motor to make soldering simpler.
- Each connection can be soldered separately by bringing each wire to the pad. Heat them, and then let them cool.
- Check the connections once you are cool.
- Continue
- Step 6: Connecting ESCs to PDB
Connect the ESC to the PDB using the same method as the previous step.
In this case, however, it is essential to connect the positive (red) and negative (wires) to the appropriate pad. This will ensure that the power system is functional.
- Step 7: Testing your batteries
It is better to be safe than sorry. So it’s time to test the power supply.
Do a continuity test on the battery’s positive and negative pins. If there is no continuity, you can plug the battery in.
This is generally where you check if any minor or major repairs need to be made.
- Step 8: Mounting your FPV system
Next, mount and set up the camera or VTX. To plug the camera in quickly, your frame should include a mount.
For beginners, it is best to keep the angle at 15 degrees.
Double-sided tape can attach the VTX to the frame’s top or bottom plate.
- Step 9: Connecting to the FVP System
Connect the FVP system and the PDB. The positive (red), as well as the negative (black) wires will be connected to the matching pads on the PDB (low-voltage, either 5V/12V).
Remember to include the video signal in your VTX. The yellow wire runs from the camera’s video into the VTX video’.
You should see the VTX lighten up when you plug in your battery. This means that you should get your photo from the camera. But first, focus!
- Step 10: Powering the receiver
The receiver must be connected to either the 12V or 5V positive ground pads on PDB to send the signal wire from the flight controller.
Now, you can bind your receiver. (Be sure to check the manual as all manuals are different).
- Step 11: Wiring up the Flight Controller
Your drone requires its brain, the flight controller.
To help you understand how to solder the pads, I recommend you consult a board diagram.
- Step 12: Completing The Build
Now, it’s time to finish the job. Attach the mount to the camera mount, finish the frame and tape any other bits and bobs.
- Step 13: Software configuration
Installing a software configuration (e.g., You will need to install Betaflight on your computer. To connect the drone, you will need a USB cable.
- Step 14: Final tests
Now it’s time for the machine to be tested. Get excited!
Make sure to test the following items in your configurator.
- Flight controller orientation
- Channels for receivers
- Motor rotation
- Arming
- Failsafe
- Finally, Test Hover
Move on to open space. Please, get away from the drone and go out to test it.
Your bird should have flown out of its nest.
You should be proud of all the hard work and time you put in. So, congratulations.
How Much Does It Cost To Build A Drone?
This is one of the questions we should discuss before anything else because most people have limited budgets, and since we’re making an FPV drone, we are looking to create a great package that’s good long-term, flies fast and is still priced decently.
Since we aren’t compromising a lot, you should expect around $200+ cost from the FPV drone with all the components, and if it’s your first drone and doesn’t have a transmitter and Goggles, that will be $150 more.
This seems like a lot, but remember that this drone should last you for years to come, and what’s more, in case of crashes, all the parts are individually replaceable.
Is It Cheaper To Build A Drone Or Buy One?
It’s very similarly priced. The difference isn’t enough to justify building one yourself to save money, as working at your job for that time would make more of a difference. The most significant advantage in building your drone is that it’s your drone; you built it yourself, and nobody can take that from you.
You can also buy a premade drone kit with all the parts already included, making it easier for you to ensure no parts are missing.
The feeling of completing something that complexes with your own hands and then actually flying it yourself is something that will put a smile on your face and impress your friends for quite some time.
How To Build Your Drone FAQ
How do you build a drone from scratch?
Building a drone is about getting the right parts and combining them into your drone.
Are drones challenging to build?
Building a drone does require some technical knowledge.
Is building your drone worthwhile?
Putting together or purchasing a drone is a significant financial expenditure. Drones and their parts are unlikely to be inexpensive. Some argue that developing a drone is more expensive than purchasing one. But, according to my drone-building experienced pals, it is not more expensive as long as you locate the correct price for each element.
Conclusion
If you’re interested in learning how to build a drone, there are a few things you need to know. First, you’ll need to decide what type of drone you want to develop. You’ll also need to know what materials to use and the best tools to use when building a drone.
Finally, you will need to learn how to control and fly a drone properly. With these tips in mind, you can build your drone in no time!


